Myrtillocactus geometrizans cv. Fukurokuryuzinboku, Myrtillocactus geometrizans

How To Care for Myrtillocactus geometrizans ‘Fukurokuryuzinboku’ The Booby Cactus

Hi Guys 😀 In this Cactus care Blog I am talking about the very unusual and very wacky and yes a little bit naughty of a cactus called Myrtillocactus geometrizans var. ‘Fukurokuryuzinboku’ also known as ‘The Booby Cactus’ 

I have made a special How To Care for video on Myrtillocactus geometrizans var. ‘Fukurokuryuzinboku‘ also known as ‘The Booby Cactus’ on my You Tube Channel called Desert Plants of Avalon and I have linked the care video at the end of this Blog 😀 

Myrtillocactus geometrizans cv. Fukurokuryuzinboku, Myrtillocactus geometrizans
Myrtillocactus geometrizans, Myrtillocactus geometrizans cv. Fukurokuryuzinboku, also known as Blue Candle Booby cactus, Breast Cactus, Titty Cactus.

ABOUT :

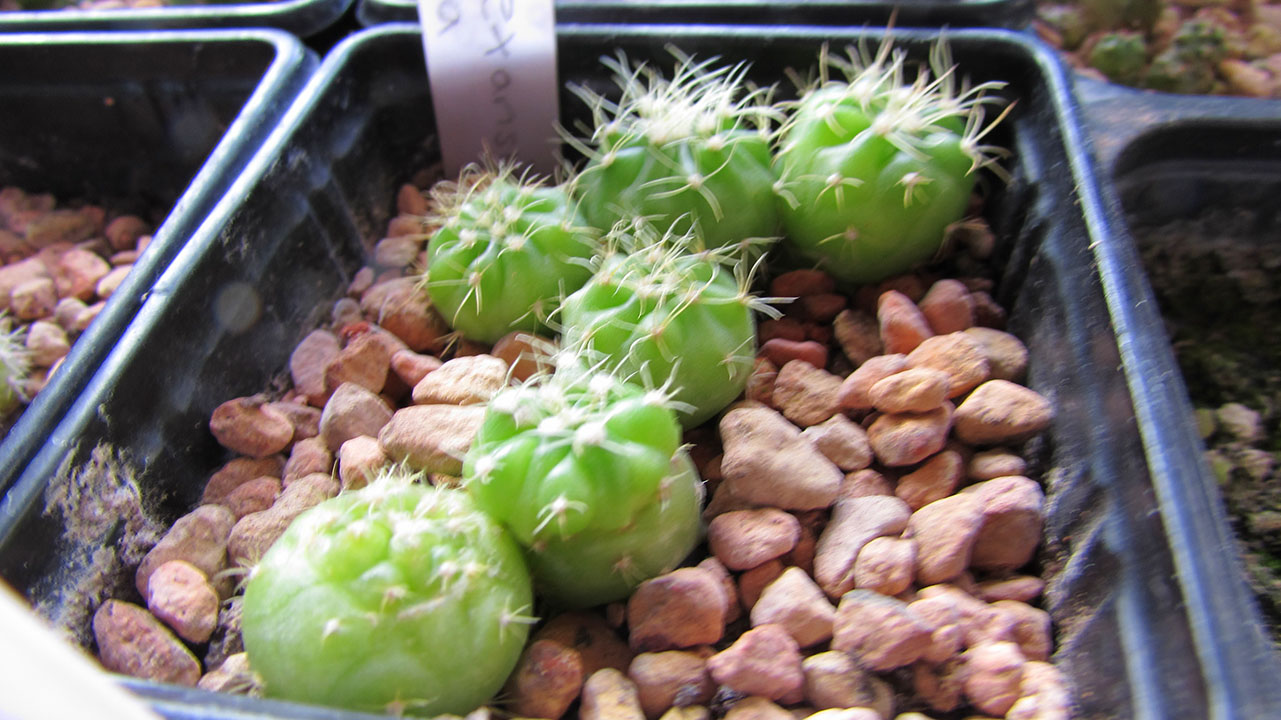
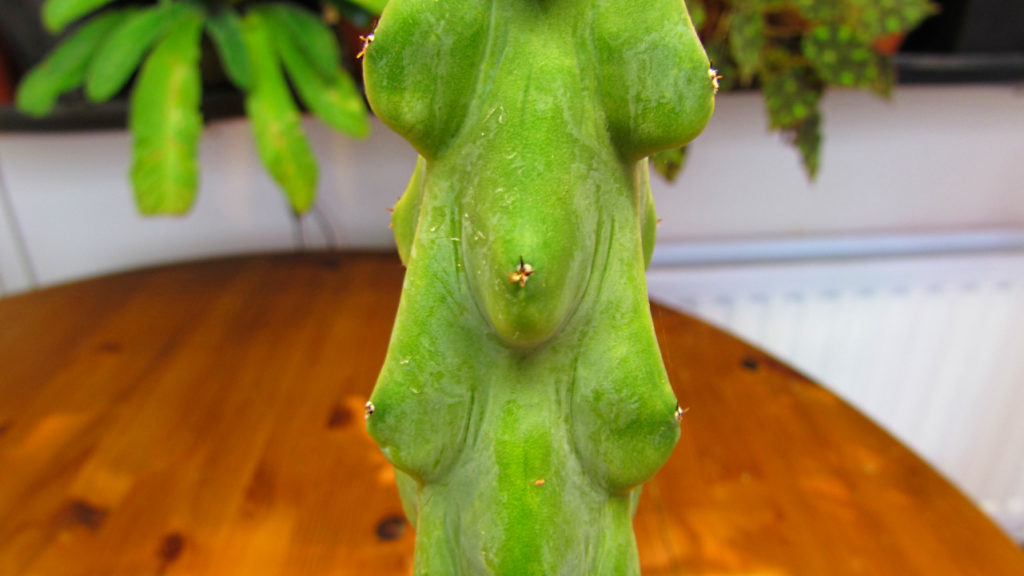
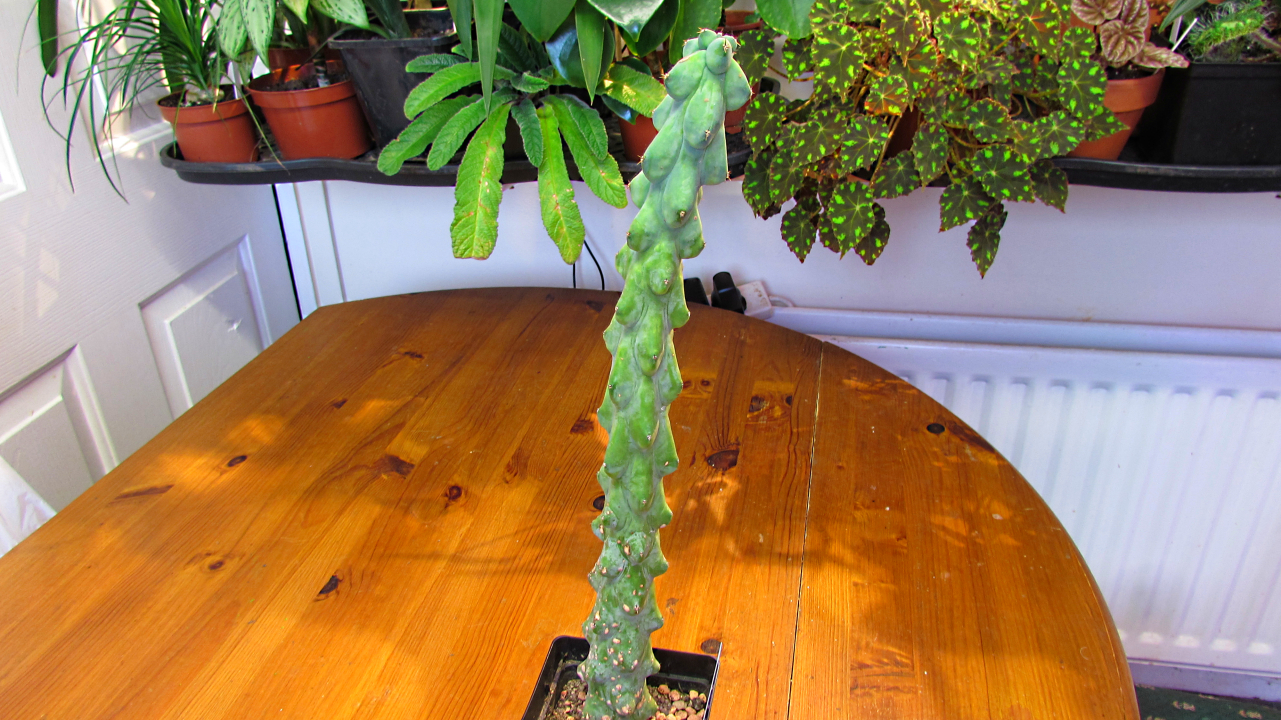
Myrtillocactus geometrizans Fukurokuryuzinboku is a monstrose cultivar of the more commonly seen Myrtillocactus geometrizans, but this Cactus has more unusual shaped ribs along with areoles that resemble nipples making this cactus appear like it has little breasts in appearance, this is why this cactus is often nicknamed as ‘The Booby Cactus’ or ‘Titty Cactus’.

Myrtillocactus geometrizans Fukurokuryuzinboku is a rare plant to find for sale and is only available from specialist cactus nurseries and online cactus nurseries but is now becoming more popular to grow in cultivation, it is definitely one of the more expensive cactus plants to buy.

It is a Japanese cultivar that can grow up to 4.5 metres high ( 178 inches ) and 10 cm wide in diameter ( 4 inches ).

LIGHT :

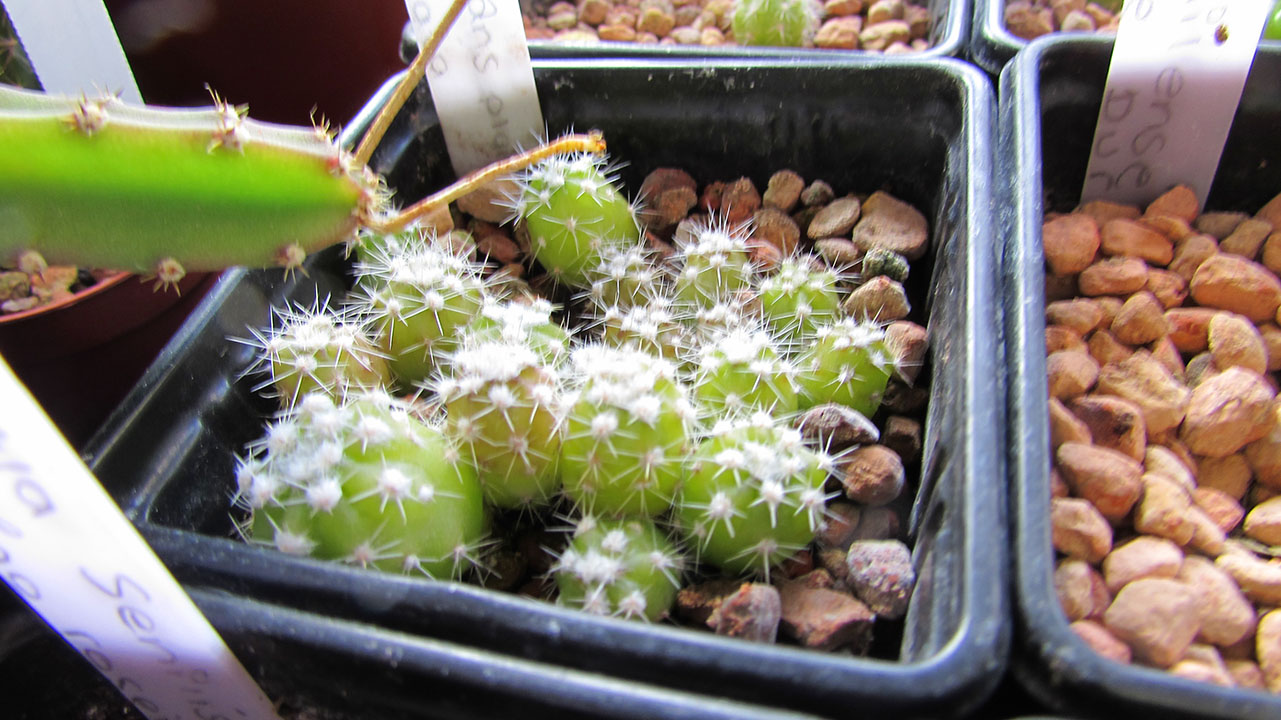
This cactus definitely like a nice sunny spot, however when these plants are still young ( less than 3 inches in height ) or if taken as cuttings they are best placed in a less sunnier position, however when cuttings have fully rooted and the plant is taller than 3 inches in height they love to be placed in a sunny position as long as ventilation can be provided. If grown on a very sunny south facing window in the middle of summer then a shade cloth may be placed over the window to allow indirect sunshine onto the plant this will prevent scorch or yellowing of the stem.

SOIL : 

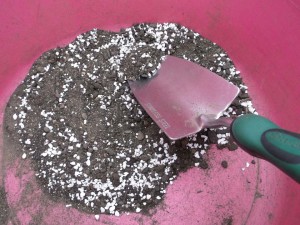
A very well draining cactus soil is an absolute must for these cacti as soil that stays wet for too long will encourage rot, a good quality well draining cactus and succulent soil mix is to be used and not any other type of houseplant soil. I like to make my own cactus soil up for these cacti and use a mix of 3 equal parts of Loam, Horticultural sharp sand, and Grit. Here is a video I have made for my You Tube Channel called Desert Plants of Avalon on How I make my own cactus soil and you can watch this video below:

WATERING : 

From Spring until mid Fall / Autumn these cacti love to be watered very regularly always allowing the soil in their pots to fully dry out first before watering them again, this is a better guide I like to give to people because when it comes to watering all cacti, one size does not fit all haha, as it can depend on many different factors for example the temperature, the climate etc, but as a good rule of thumb during their active growing period of Spring until mid Fall I recommend to water every time the soil in their pots has fully dried out.

In Winter these cacti like to have a winter rest period and no water should be given from late Fall / Autumn  until Spring. Its normal for these cacti to shrivel as they use up their water stores during winter and their little ‘breasts’ will start to shrivel haha ‘however if you are overwintering your cactus indoors in a heated room and notice that the cactus is looking a bit too shrivelled you can go ahead and water just enough to plump up the plant again, but avoid doing this if growing your cactus in a cooler environment e.g a greenhouse or polytunnel etc, due to the cooler temperatures and higher air humidity levels of a greenhouse or polytunnel or other outdoor structure, its better a few wrinkly ‘boobs’ than  rotten ones haha, and your cactus will soon plump back up again in Spring when normal watering resumes.

Clean Rainwater is always best if you have access to it, but if not then let your tap water sit for 24 hours to help to dissipate some of the chemicals that are present in tap water.

FERTILISING : 

From spring and Summer feed these cacti once every 3 weeks with a good quality cactus and succulent fertiliser. Do not feed at all in Winter when these plants are resting.

TEMPERATURE : 

Myrtillocactus geometrizans Fukurokuryuzinboku can not take frost and in Winter this cactus must be kept above 10 Celsius / 50 Fahrenheit, many growers would recommend that they can take lower than this if kept totally dry over winter but personally I would not recommend it as Myrtillocactus has a tendency to scar and scab and at the worst case rot in low temperatures during the Winter months when they are dormant, especially in my climate in Ireland and the UK where the air humidity is very high outdoors in winter, if you live in a more arid winter environment and country then its possible these plants can take lower temps in Winter but avoid frost at all costs.

During the Spring and Summer these cacti can take very high temperatures as long as plenty of ventilation can be given. If growing behind glass, e.g in a sunny window or greenhouse or conservatory, sun room etc, then windows must be open or and a fan / doors etc for ventilation during very hot and sunny days.

Myrtillocactus geometrizans, Myrtillocactus geometrizans cv. Fukurokuryuzinboku, Blue Candle Booby cactus,Cactus, Breast Cactus, Titty Cactus,

RE POTTING : 

Its best to re pot these cacti during their active growing period in Spring and Summer and only when the plant has outgrown its pot, as with all cacti its far better to under pot rather than over pot because too much soil around their roots can stay damp for too long and may encourage the chances of root rot.

FLOWERING : 

Myrtillocactus geometrizans Fukurokuryuzinboku will bloom when mature from about 60 cm tall in height ( 24 inches ) The flowers form in Spring and are small white flowers.
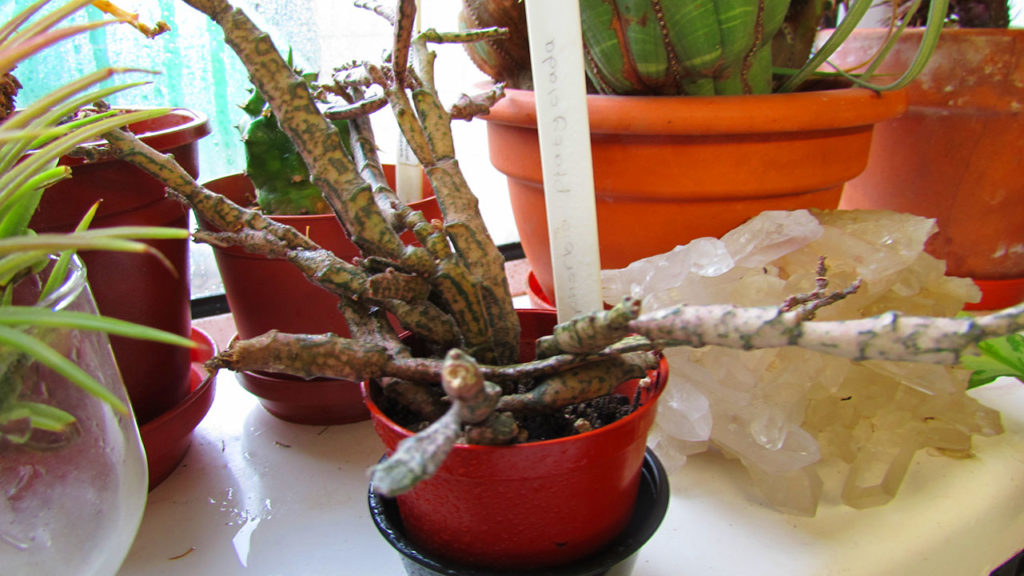
PROPAGATION : 

Propagation of Myrtillocactus geometrizans Fukurokuryuzinboku is from cuttings taken in Spring and Summer. Cuttings need to fully dry ( callus ) over for a couple of weeks or more until a hard white callus has formed at the base of the cut before planting up as cuttings. Cuttings of these cacti need very warm weather above 18 Celsius / 65 Fahrenheit to root for the best success, additional heat with a heat mat can help with rooting these cuttings if your Summers are cool and damp like mine in Ireland and UK.

Seed propagation of Myrtillocactus geometrizans Fukurokuryuzinbokus is not recommend, this is because this cactus is a monstrose variety of the original Myrtillocactus geometrizans and any seeds germinated will grow as normal Myrtillocactus geometrizans cactus plants and will not grow with the little ‘breasts’.

I have made a video for my You Tube Channel called Desert Plants of Avalon on How to care for Myrtillocactus geometrizans Fukurokuryuzinboku aka The Booby Cactus and you can watch this video below :

I hope you enjoyed reading and learning lots about this very bizarre and wacky cactus.

Check out my Cacti and Succulent You Tube Channel called Desert Plants of Avalon for lots more tips and tricks on many different types of cacti and succulents and also for lots more info on how you can care for your Cacti and Succulents.

Thanks so much for reading and sending you all lots of HAPPY GROWING.


How to Grow Cacti & Succulents from Seed

In this Blog I will be talking about how you can grow cacti and Succulent plants from Seed and talking about the method I like to use to grow my cacti and succulent plants from seed and I have had great success throughout the years using this method.

how to grow cacti from seed
Photo: My Homalocephala texensis ‘Horse crippler cactus’ cactus seedlings just over a year old

Although there are many different ways to grow cacti and succulents from seed and there is no right or wrong way, In this Blog I will be showing you how to grow cacti and succulents from seed using the bag method.

I have included videos I have made for my Cacti & Succulent Plant You Tube channel called Desert Plants of Avalon that include step by step instructions on growing Cacti and Succulents from seed as well as a video on how to care for seedlings during their first Winter.

Why grow from Seed ? 

Growing from seed can be very rewarding as you get to see your plants grow from seedlings to mature plants over the years and although it can be very time consuming, knowing that you have grown your cacti and succulents from seed is a real buzz.

When is the best time to grow from seeds ? 

Cacti and Succulent seeds are best sown in late Winter, Spring or early Summer, this is because the days are longer and the temperatures are warmer, but if you have grow lights and additional heating then you can still sow seeds in Autumn and Winter too, the most important thing is that the seeds /seedlings are kept at a minimum temperature of 70 Fahrenheit  /21 Celsius.

cactus seedlings, how to grow cactus from seed
                                                        Photo:  My Rebutia muscala cactus seedlings at 8 months old.

What do I need to grow from Seed ? 

You will need :

Seeds, plant pots, transparent zip lock bags, a pen, plant labels or white sticky labels, 2 parts loam based seed sowing soil ( or any well draining soil ) 1 part grit or perlite and 1 part horticultural sand.

I have found that the clear fruit pots that you commonly see cherry tomatoes or strawberries sold in are perfect sizes to use as small seed pots and they fit perfect in the bags too as well being a great way to us as recycling,  just make sure that you thoroughly clean them first before using them for seed sowing.

How do I grow Cacti and Succulents from Seed ? 

If you want to watch a step by step video on How to Grow cacti and Succulents from seed then check out my video I have made for my You Tube channel called Desert Plants of Avalon below: 

Thoroughly mix up the 2 parts seed sowing soil with the 1 part perlite OR grit with the 1 part Horticultural sand. You can use the amount of soil mix to the amount you need depending on the size of your seed pots.

If the soil you are using has stones or lumps of bark chippings in it etc its best to remove these by running the soil through a gardening sieve first.

thoroughly mix up the seed sowing soil with the perlite or grit and the horticultural sand, you can remove any hard stones or bark chippings etc by running the soil through a gardening sieve first before mixing.

Once you have thoroughly mixed up all the soil with the perlite or grit and sand then its best to sterilise the soil by either microwaving it or heating it in the oven, this is optional but its something I like to do as it helps to reduce fungus and bacterial attacks on the young seedlings after they have germinated.

If you are sterilising the soil in the microwave then put all of the soil mix into the microwave on high setting for 3 minutes stopping half way through to thoroughly sir the soil mix with a clean spoon, its important that the soil mix is extremely hot as this is what will kill any pathogens and to sterilise your soil.

If you are sterilising your soil mix in the oven bake the soil mix at 180-200 F. /82-93 C for at least 30 minutes, or when the temperature of the soil mix reaches 180 F. (82 C. you can test the temperature of the soil by using a cake thermometer. 

Allow the soil mix to cool down before putting into the seed pot/s.

Once the soil mix has cooled down put the soil mix into the seed pots and place the seed pots in a tray or trays filled with 2-3 inches of clean water, if using rainwater it may be best to boil the water first and allow to cool down so any pathogens that could be in the water are reduced.

Leave the pots in the water until the soil mix in the pots is completely soaked with the water, this can take up to an hour or more but its important to be patient so the soil mix is thoroughly moist all the way through the soil.

Write the name /s of the seeds you will be sowing on the Plant labels / white sticky labels that you will be putting on the bags, and also the date you are sowing the seeds.

Make sure your hands are thoroughly clean then sow the seeds evenly across the surface of the plant pot/s. If the seeds are very small its best to sprinkle them on like pepper as evenly apart as possible but with larger seeds such as Opuntia or Aloe seeds you can place them onto the surface individually and gently press them down. 

Once you have sown the seeds you can very lightly sprinkle some horticultural sand on the top of the soil but make sure the sand is moist. By using sand this can help to minimise moss that often likes to grow on the soil that the young seedlings are growing in due to the soil always needing to be kept moist.

Place the seed pots into the clear plastic bags and make sure to release all the air inside the bags first before sealing the bags. 

Place the bags in a bright well lit location that receives some sun but not intense sun or intense heat.

Keep the seedlings inside their clear bag/s for a minimum of 3 months but you can keep them in the bags for longer than this if the seedlings are still small, I have kept seedlings in the bags for up to 10 months if they are still small and the soil inside the bags is still moist.

echinopsis subdenudata seedlings, cactus seedlings, domino cactus seedlings, sea urchin cactus seedlings,
My Echinopsis subdenudata cactus seedlings commonly known as The Sea Urchin Cactus or Domino Cactus. These seedlings are one year old.

After Care: 

NEVER open the bag/s until after a minimum of 3 months this is to continue to keep the seedlings and soil sterile, however if you notice your seedlings have fungus or any other problems sometimes opening the bag/s may be inevitable.

The young seedlings should not dry out in the bags for up to 3 months, this is because the clear bags act like a mini greenhouse and there is no room for the excess water inside to evaporate, and young seedlings do not take up large amounts of water, however if you notice the soil inside of the bag/s looks like it i drying out then you will have to open the bag/s to water before the 3 months.

After 3 months you can gradually unzip the clear bags over a few days to allow the seedlings inside the bag to acclimatise to the drier air outside of their bag/s in their new environment after a few days you can then take them out of their bag/s completely.

If after the 3 months your seedlings are still small then they can still stay in the bag/s for many more weeks or months if the soil inside the bag/s is still moist, sometimes I will leave my seedlings up to 9 months in the bag/s if there is no need for them to come out of them.

cactus seedlings
A selection of my cacti and succulent seedlings all grown by using the bag method.

How do I care for young cacti and succulent seedlings during their first Winter ? 

This can be confusing to many people because we are told as cacti and succulent growers to keep our plants cool and dry over Winter, but what do we do with young seedlings especially during their first winter ? because a cold and especially dry period could kill them off as the are still so young and their roots will still be fine and developing.

I strongly recommend that you overwinter your young cacti and succulent seedlings indoors at a minimum temperature of around 15 C/ 60 F for their first Winter. I would also still continue to water them lightly just enough to stop the delicate root hairs from drying out.

In their natural habitats in Winter young cacti and succulents would be growing under the shade of larger plants and vegetation where they would naturally be receiving more humidity and warmth than their mature parents that are  more exposed to the elements, therefore in nature in their natural habitats in dry arid deserts even in the Winter young seedlings would still be receiving moisture from the humidity on the lower grounds of the vegetation for their young developing root systems. 

After their first year you can continue to treat them as you would more mature cacti and succulents depending on their size and what type of cactus or succulent they are.

Here is a video I have made for my You Tube channel called Desert Plants of Avalon on How to care for Cacti and Succulent plant seedlings during their first Winter and you can watch this video below : 

If you have watched my video on How to Grow Cacti from Seed that I have made for my You Tube channel called Desert Plants of Avalon then check out the video below I have made on the update : 

Good luck with growing from seed Guys and more importantly HAVE FUN 😀 


Euphorbia platyclada

How to Care for Euphorbia platyclada – The dead Succulent Plant

Hi Guys 😀 

In this Blog I am going to be talking about a very weird and very wacky Succulent plant called Euphorbia platyclada and I have also made a special care video on this plant for my Cacti and Succulent You Tube channel called Desert Plants of Avalon and I have the video at the bottom of this Blog page.

Euphorbia platyclada belongs to the Euphorbiaceae group of Succulent plants.

Euphorbia platyclada is a real oddity and because of its ‘weird and dead like’ appearance it is more commonly known as ‘The dead Plant’ ‘Dead Stick Plant’ ‘Dead Wood  Plant’.

Euphorbia platyclada
Euphorbia platyclada is a weird and wacky and unusual wonderful little Succulent plant that always looks dead.

This weird and wacky plant is a pinky brown colour and the pink colour becomes brighter in bright sunshine and during the Summer months, in the Wintertime this plant loses its colour more and goes a lighter pink almost grey appearance. The stems are flattened and mottled and hard to the touch resembling ‘dead scabby sticks’ and they emerge from a heavy rootstock, the plant itself is small and totally leafless, the flowers are extremely small and are a orange yellow colour.

The plant itself is not very pretty haha but personally I love its uniqueness and wackiness and I love anything that is different from the norm haha.

Euphorbia platyclada is from Madagascar in Africa where it grows in its natural habitat on the floor of forests.

HOW TO GROW EUPHORBIA PLATYCLADA

Euphorbia platyclada loves a hot and sunny position such as a south facing window or in a sunny greenhouse or conservatory.

These plants can be placed outside during the Spring and Summer months as long as they can be protected from excess rain and winds. They can take a very high temperature as long as plenty of fresh air can be given, In Winter its best to keep these plants above 10c / 50F but they can take lower than this for brief periods especially when kept dry but never overwinter them any lower than 5c / 41F as they can be prone to rot and fungal diseases at temperatures lower than this, ideally try to keep above 10c / 50F at all times.

These plants like plenty of water during the active growing season from Spring to early Fall / Autumn but always allow the soil in their pots to fully dry out before watering them again because Euphorbia platyclada just like all Euphorbia Succulents do not like their roots to be sitting in wet soil as this can cause root rot. From mid Fall / Autumn to late Winter reduce watering  to the bare minimum and only water enough just to stop the plant from shrivelling too much.  In the Winter I only water my Euphorbia platyclada once every 2 months and I overwinter it on a sunny south facing window in my Kitchen. Rainwater is always preferable to tap water if it is available.

Euphorbia platyclada like to be grown in small pots due to their small but heavy rootstock, it is always safer to under rather than over pot, and grow them in a well drained soil especially for  Succulent plants, I like to make my own soil mix up for my Succulents and cacti and use a loam based soil with added perlite or grit and added horticultural sand, but you can use any well draining soil mix to your preference, the most important thing is that the soil is free draining. Re potting is always best done during the Spring and Summer months.

If you want to know How to make your own Cactus and Succulent soil here is a video below that I have made for my You Tube channel called Desert Plants of Avalon on How to make your own Cacti and Succulent soil in 3 easy steps : 

These plants can easily be pruned to keep in shape and cuttings can be taken to be propagated by allowing the cutting to ‘callus’ over for a few days before planting in a well drained soil mix. Its important to be careful when taking cuttings of all Euphorbia plants because of their milky sap than can be irritating to the skin and extra caution should be taken when taking cuttings of all Euphorbia Succulents.

Here is a special care video below that I have made for my You Tube channel called Desert Plants of Avalon on How to care for Euphorbia platyclada and you can watch this video HERE:

Wishing you ALL an abundance of love and happiness and HAPPY GROWING 😀